Deploying to itch.io
Deploying to itch.io
Before deploying your game to itch.io you will need to have your exported game files. You will also need an account and some screenshots of your project. If you are unsure how to export your game, please see the Building Your Game section.
Here's what we will do:
Creating a project on itch.io
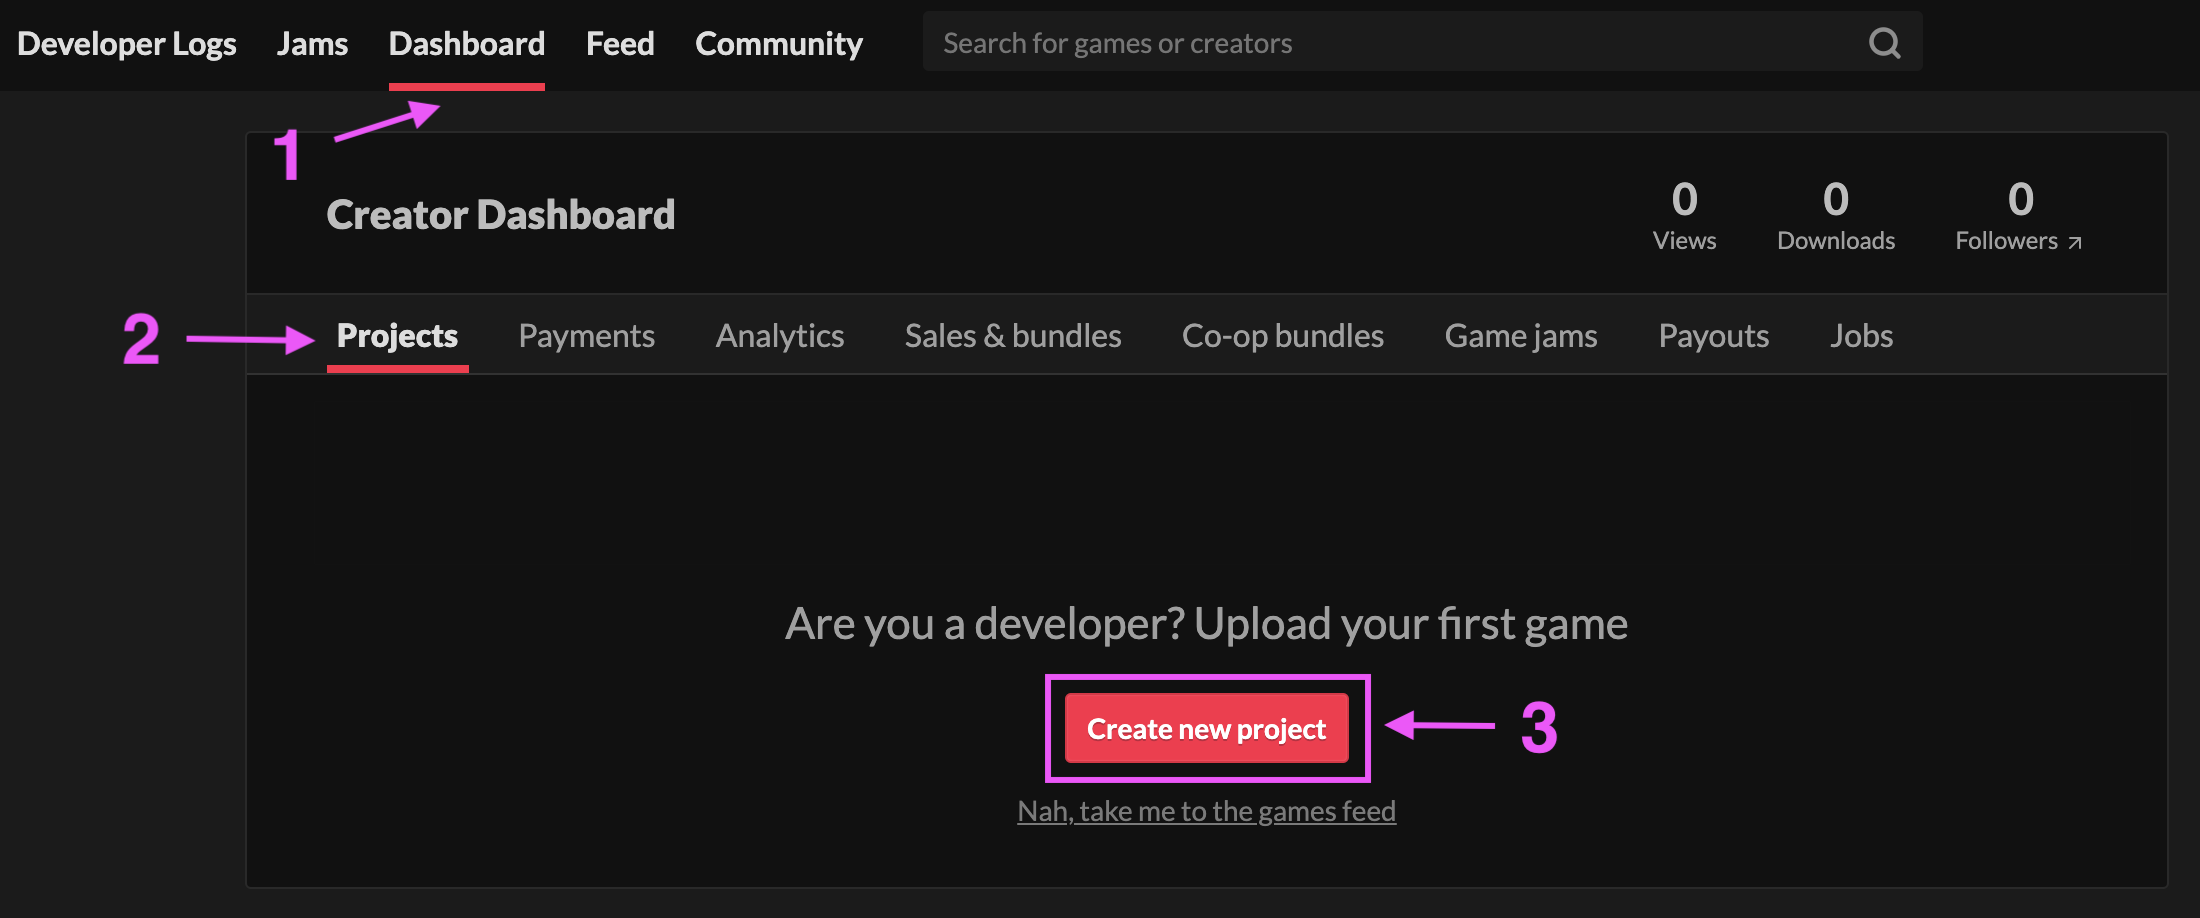
Once you have logged in to your account, select the Dashboard tab and check that you are in the Projects tab in the "Creator Dashboard".

Press the Create new project button.
Tips
There are many options in when you deploy your game to itch.io, we will only cover the basics needed to get your game deployed. Feel free to experiment in this section or consult the official itch.io docs for more detailed guides.
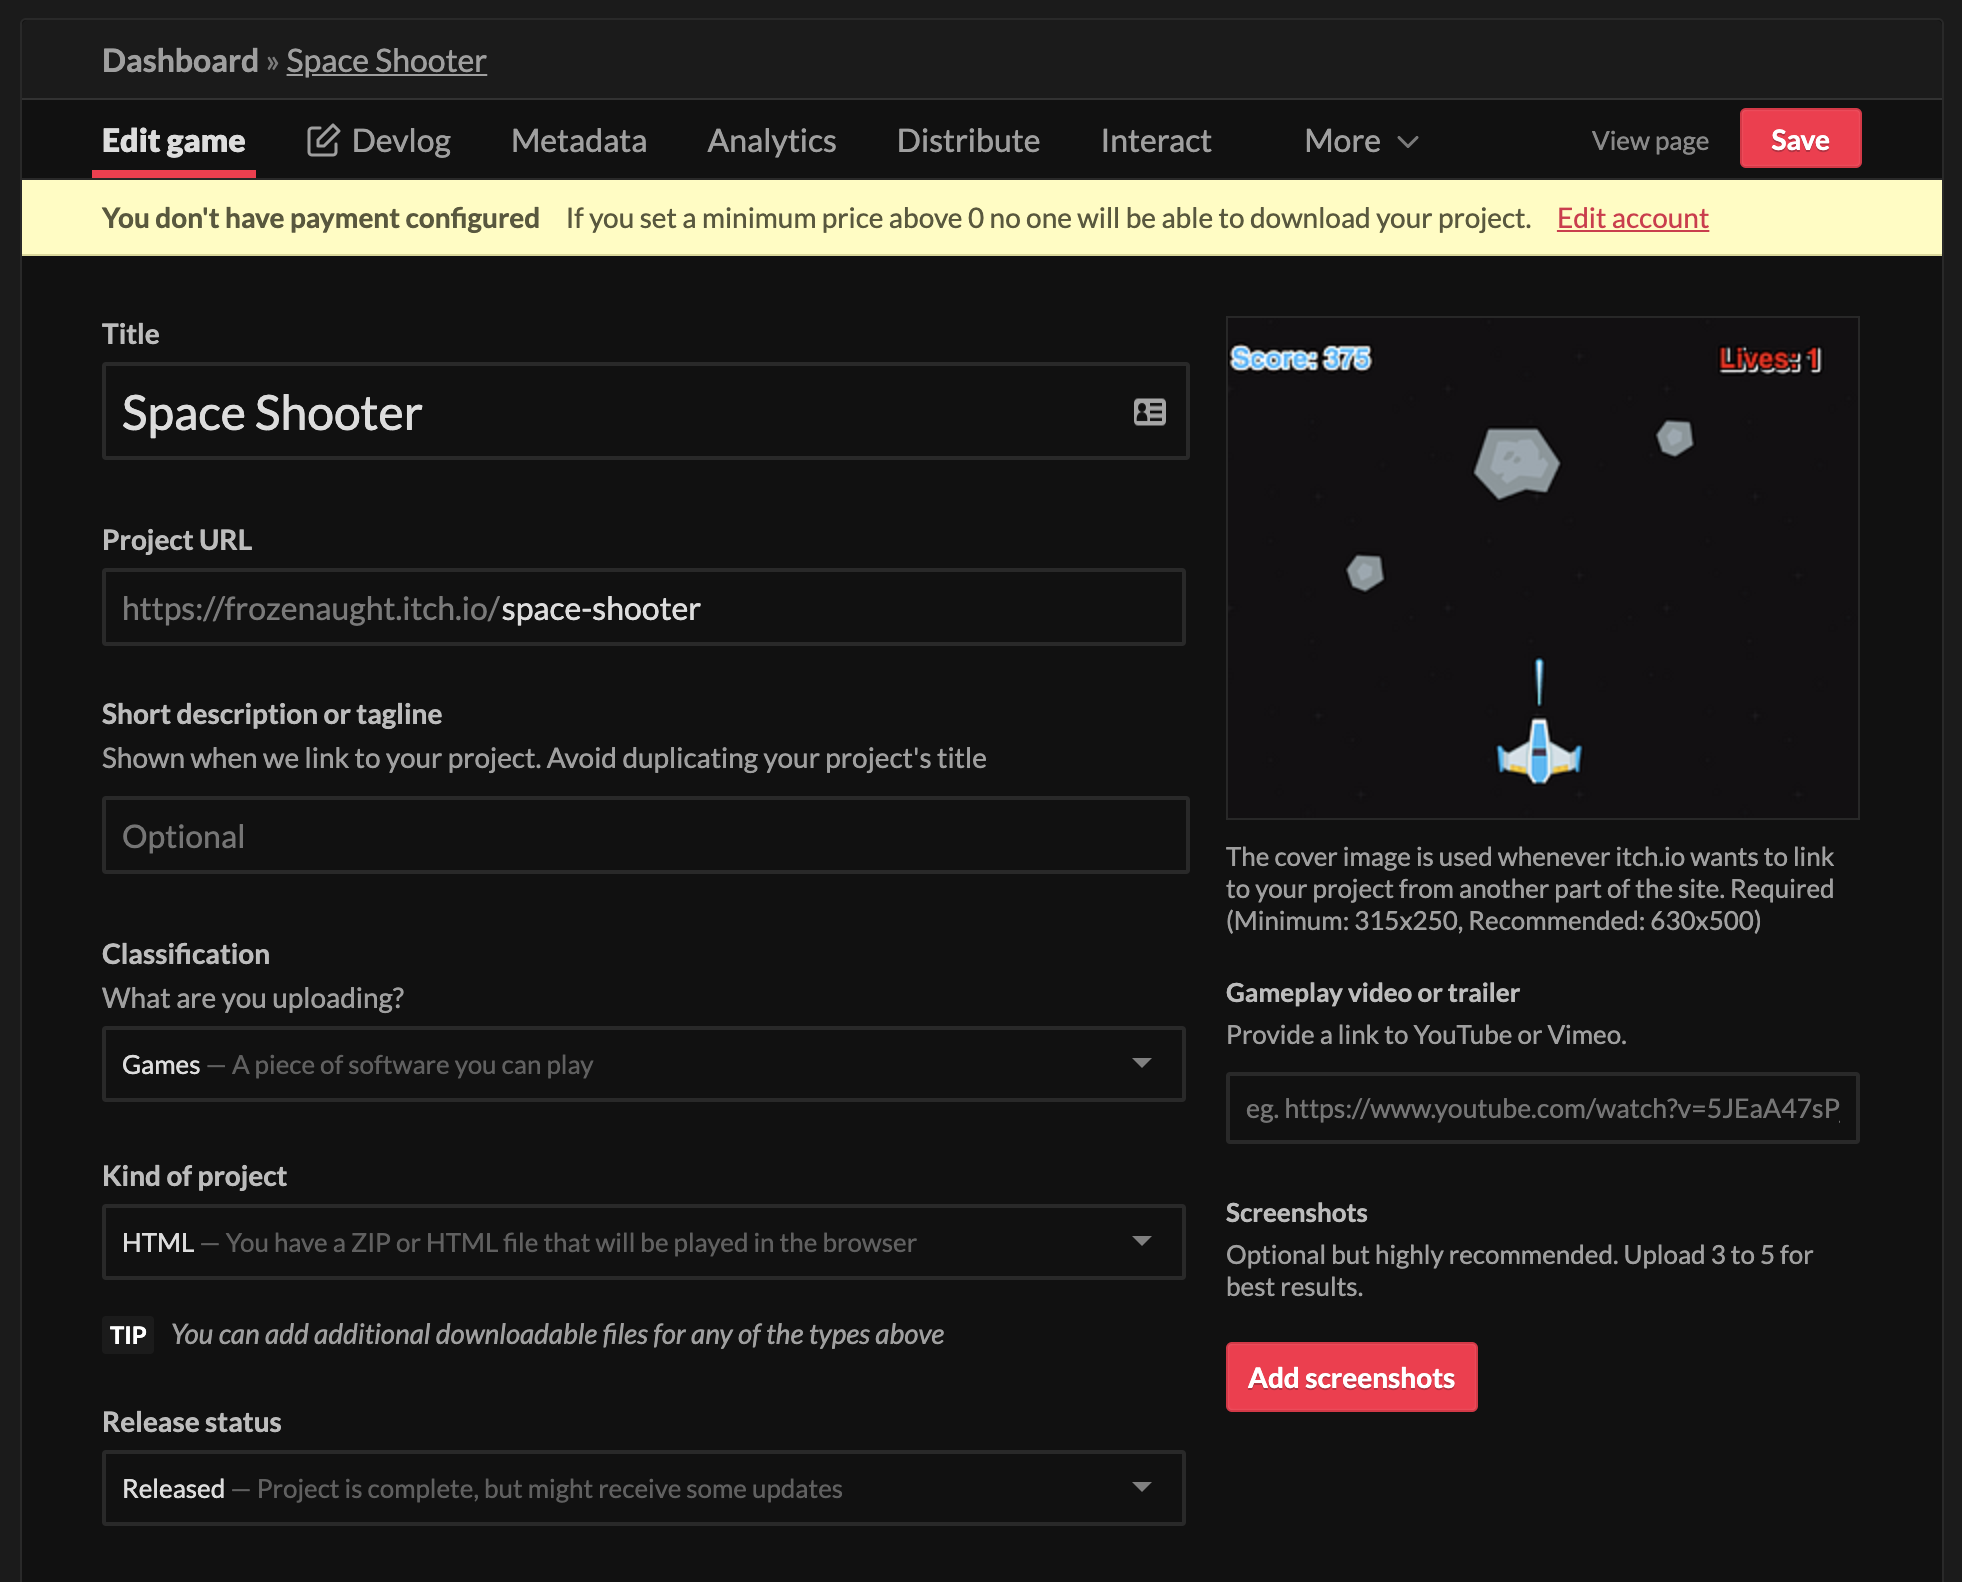
Let's fill in the following fields:
- Title: Enter the title of your game here.
- Project URL: This should automatically be generated for you, it is the URL where your project will be hosted.
- Kind of project: For this example we will choose HTML as we will be uploading a web version of our game.
- Upload Cover Image: Let's add a cover image so that players can see our game.
- Additionally, you can add game tags, screenshots, and other settings here.

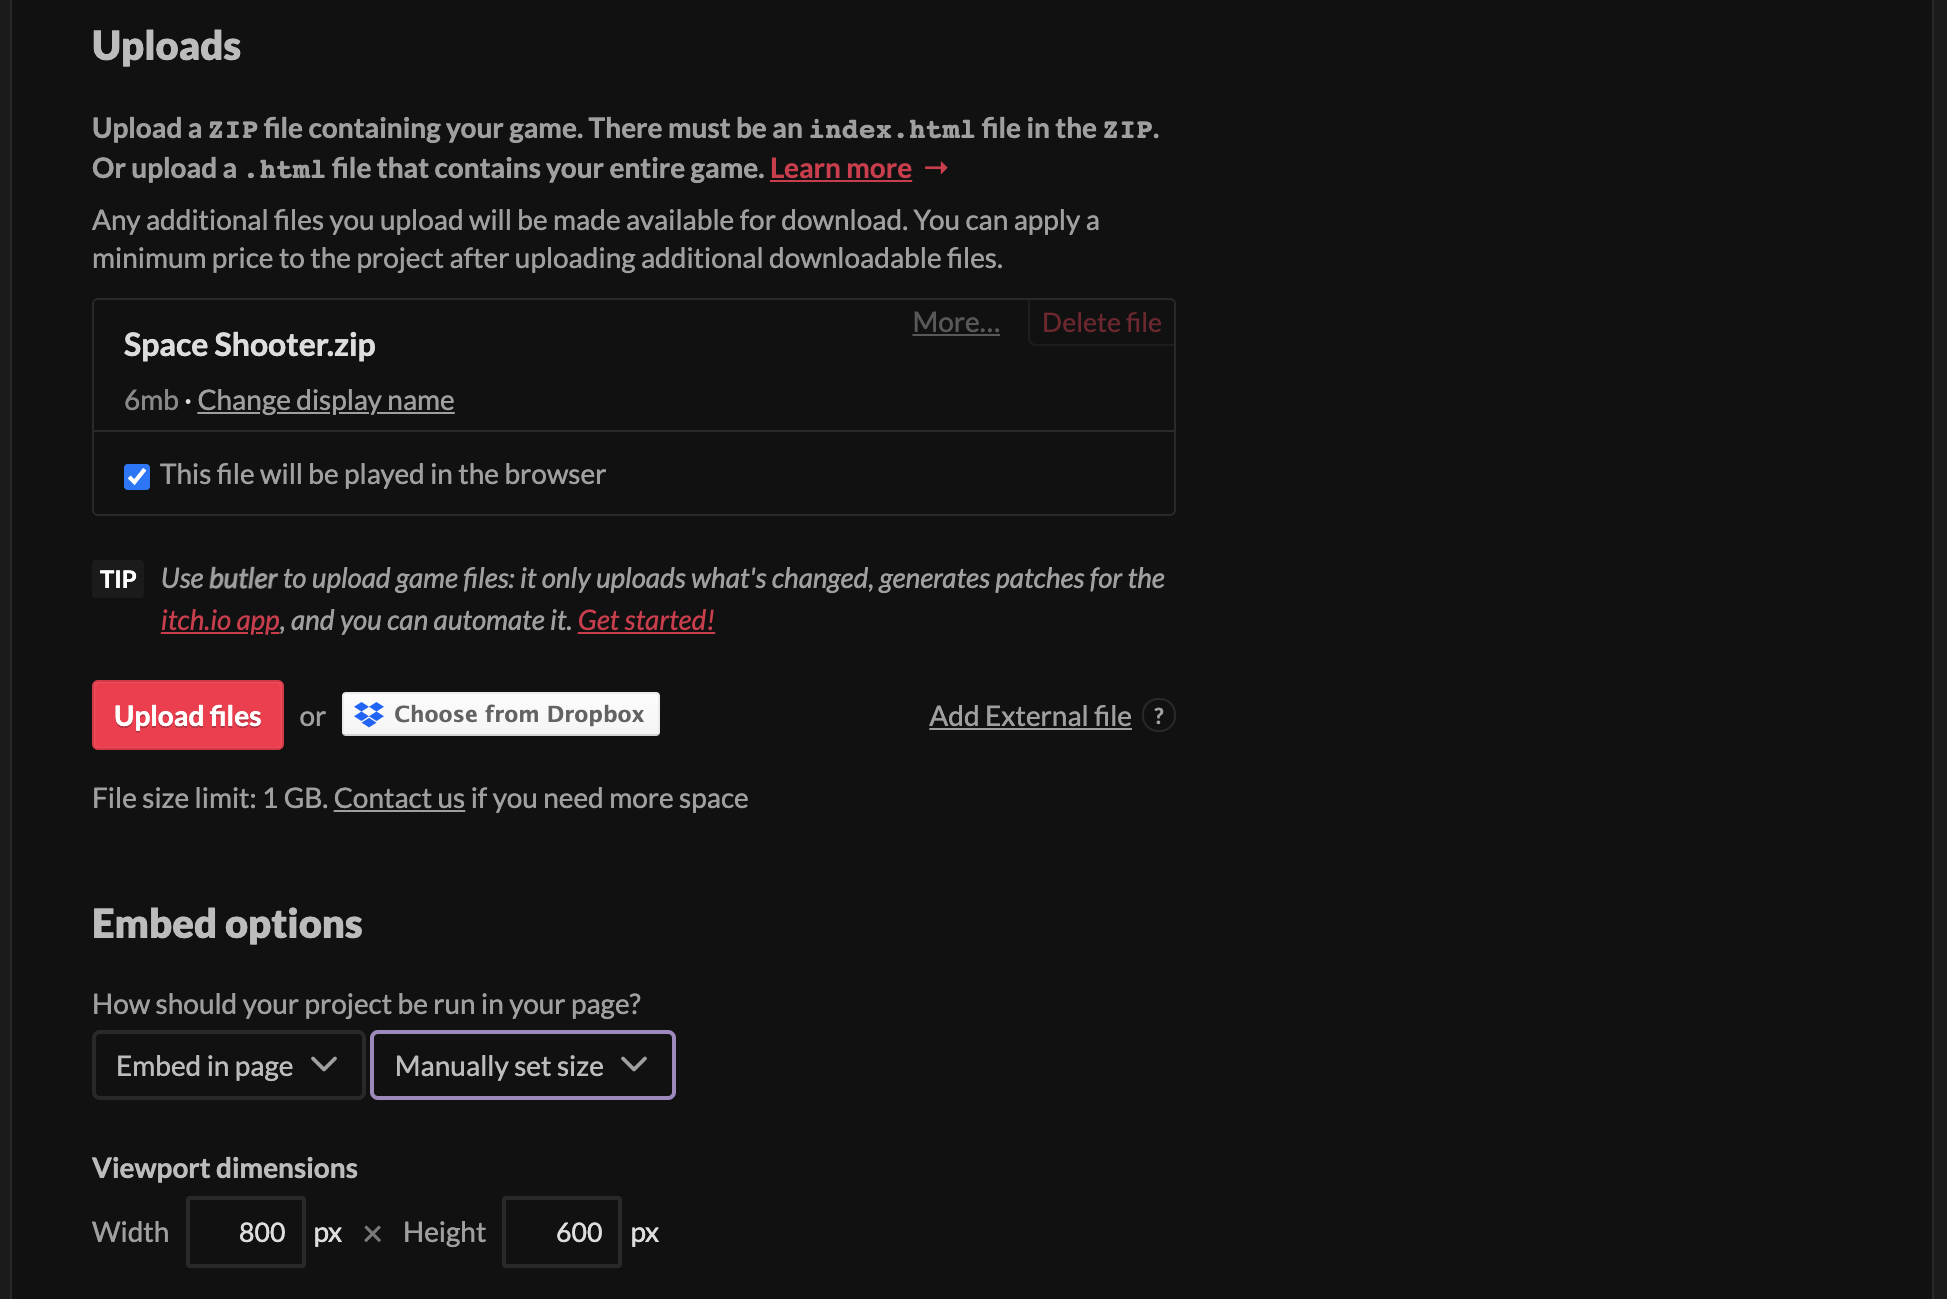
The next most important thing would be to upload our game files. Navigate to the "Uploads" section of the form. Select the upload files button and upload the .zip file you exported from ct.js.
Once uploaded, select the checkbox labeled: [x] this file will be played in the browser

Tips
There are some additional options here if you are uploading the executable files. For detailed explanations on these options, please consult the itch.io docs
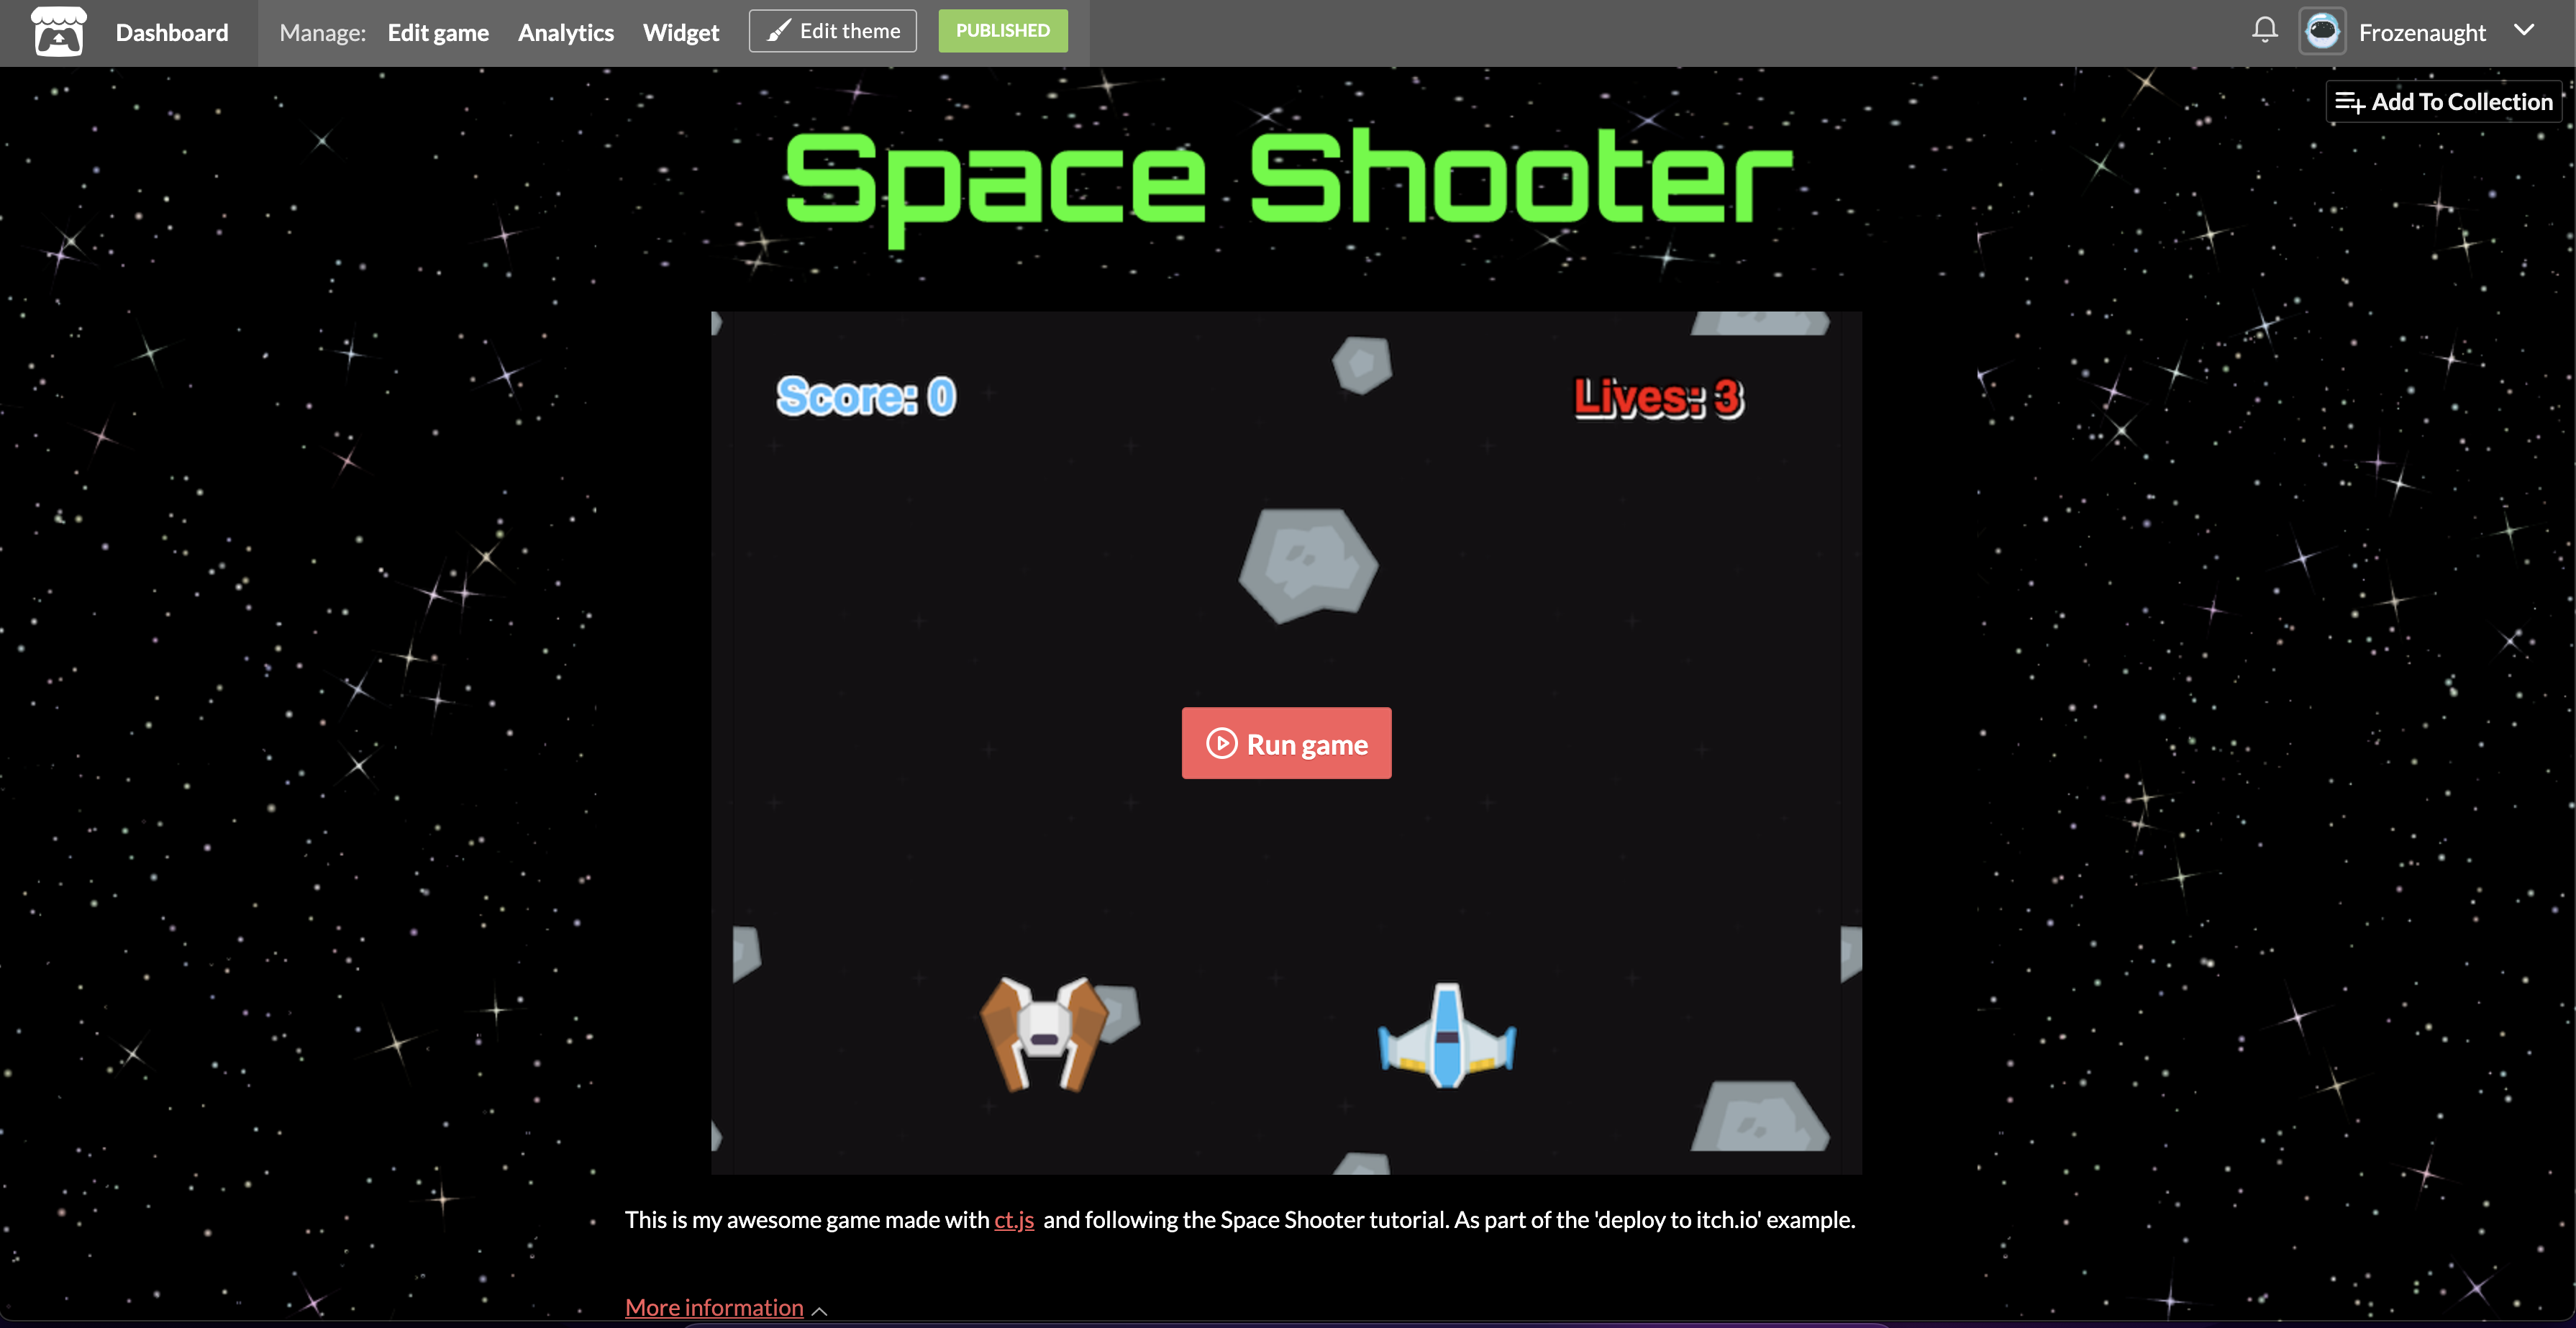
Preview the game page
Once you are happy with this section, press the Save button. Then select the view page link to see what players will see when visiting your game page.
To customize the look of the game page, select the Edit Theme button. A basic example of changing some of these options is shown in the screenshot below.

